Introduction #
This post is a quick overview for a fix I had to implement on a toddler ride-on push car. My son’s toy had two of three buttons fail, with only the music button retaining functionality. Although I am not sure of the exact model, it appears to be a “Costway Foot-to-Floor Kids Ride-On Push Car Toddler Sliding Car w/ Horn and Music Red” like this one at Walmart.
Disassembly #
Since this was a quick repair, I did not take pictures of the initial disassembly. The steering wheel piece was removed from the car with one Phillips screw, and then on the reverse side of the steering wheel there are four more small Phillips screws to remove. Once all screws are removed, two clips are pushed in to release the front face of the steering wheel.
Repair #
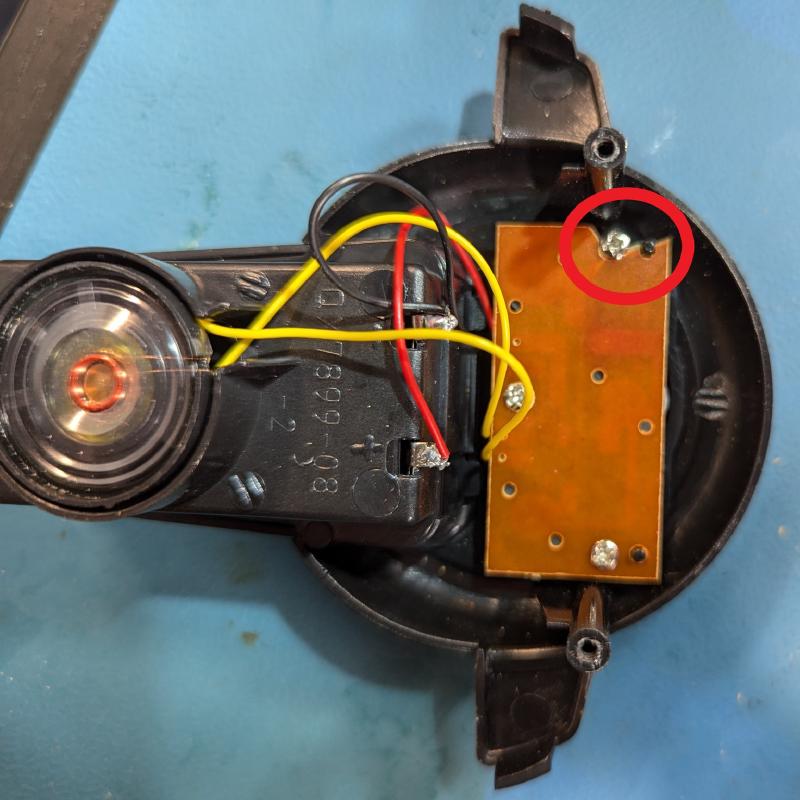
After removing the front cover, there was clear damage to the controller PCB. It is likely that the buttons were pushed a little too enthusiastically by the young user.
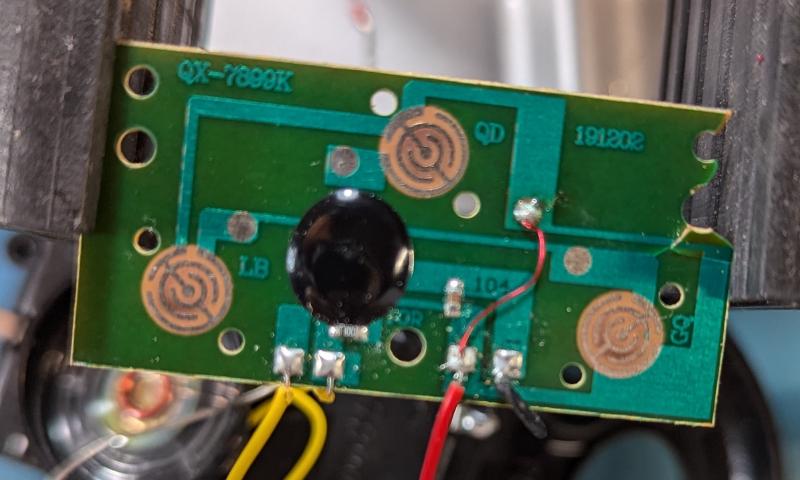
Flipping over the PCB, you can see that the layout has a single trace that runs through the damaged corner to provide the positive voltage to one side of each button. In the image, the trace is partially obscured by the black wire.
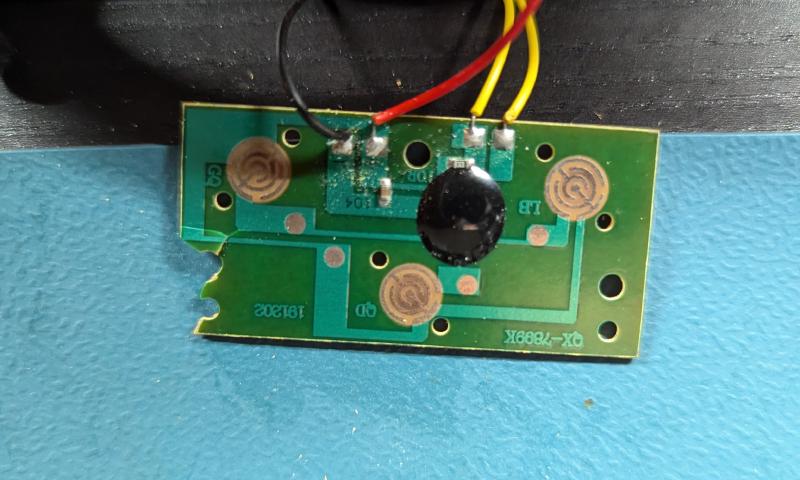
This damage can be remedied with a small wire directly between the pad with the incoming red wire from the battery compartment and the test point near the center button. I used a solid core 30-gauge wire since this was the most accessible to me on my bench at the time, but thicker wires should be OK too as long as they don’t interfere with the switch assembly. Since these are digital inputs, they are unlikely to carry significant current.