Introduction #
If you’re not familiar with gridfinity, it is a framework for organizing storage into 42x42 mm grids. Users typically measure their drawers, shelves, or other flat surface they want to install organizers on, print out base plates to fit the space, and then print the required bins to install on top of the base plate. Bins can have mechanisms for attaching such as magnets or friction fit posts, or they can be held in simply by gravity. In this post I discuss my first gridfinity space that I put in my kitchen to store batteries.
Sizing up the drawer #
The drawer in my kitchen for my batteries is 12 inches (304.8mm) across and 11.25 inches (285.75mm) front to back. It is just under 74mm tall.
Dividing the width and length by 42mm, I get that the drawer would fit 7 dividers across, and 6 from front to back to form a 7x6 grid. There is some space left over, but I’m going to ignore this for now. I could instead try to print spacers or print thicker edges to make the grid fit snugly, but the plan is for the weight and occasional physical interventions to be good enough.
Making the base plate #
Now that I have an idea of the space to fill, I have to start getting STLs. Luckily, there is a Gridfinity Generator online that allows easy generation of basic bins and base plates for a variety of gridfinity options. My printer has a 256x256mm print area, so I cannot print the full 7x6 grid and will instead have to print the base plate in two runs - one 3x6 (87.02 grams of plastic) and one 4x6 (115.70 grams of plastic). When generating the files, I left the default options in the calculator (skeletonized baseplate, spaces for 3.25mm radius magnets).
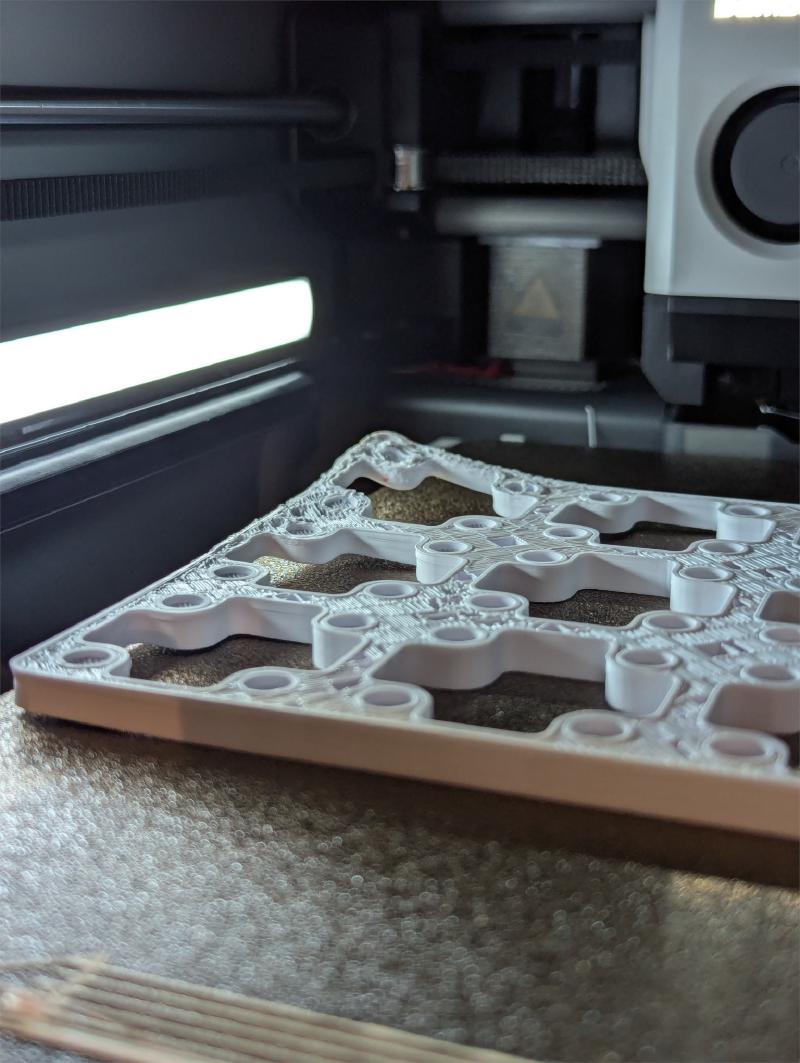
Once I started printing I realized I had a problem with warpage. The back left corner of each grid was tilted upward so I stopped the print early.

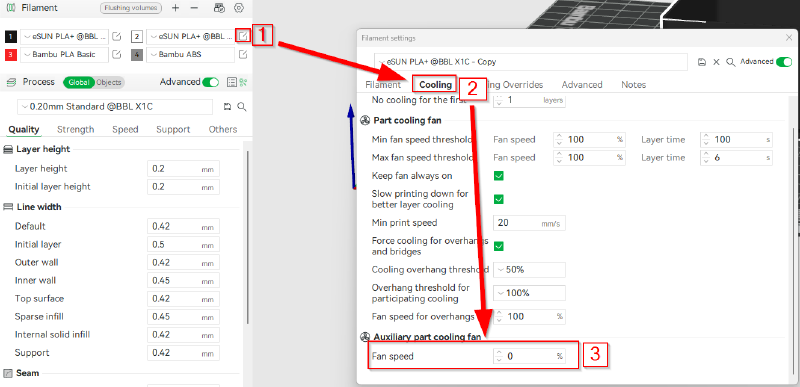
After searching the internet, and a few more test prints, it appears that the best way to address the warpage when printing in PLA is to turn the aux fan on the X1C off. The default PLA+ profile had it at 40%, but once I set it to 0% I had no more issues. When printing in PLA+, I also leave the door of the printer cracked to manage heat buildup.

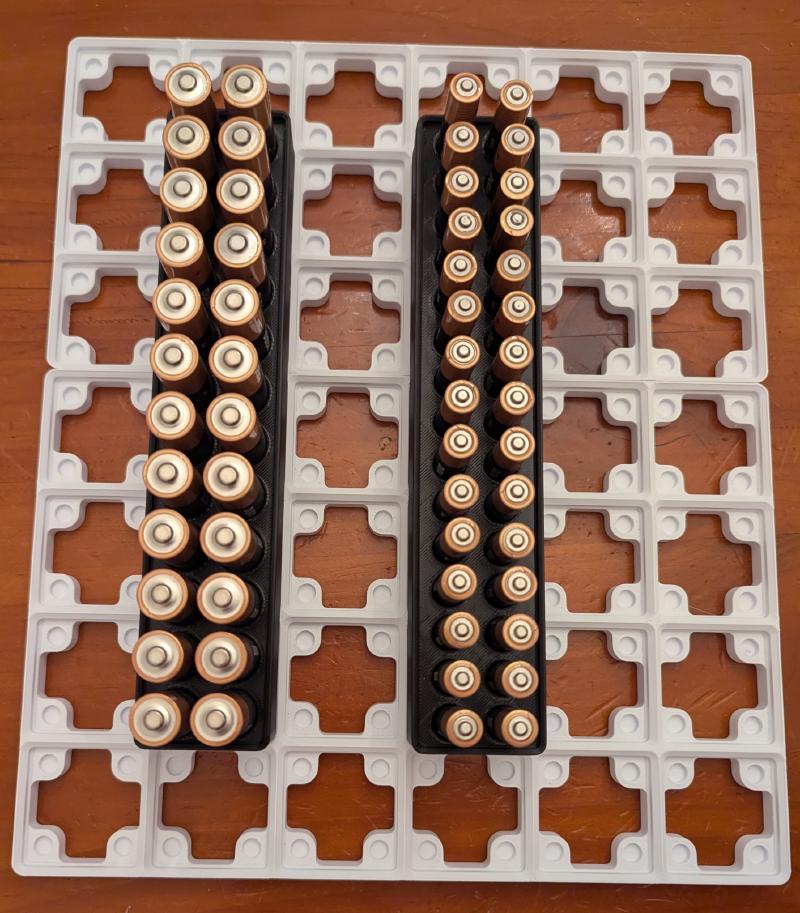
Once I had the two base plates printed, I printed two bins from Sebacho9 on Makerworld to hold them together with the right spacing while I set some glue in between the plates. I used Gorilla glue superglue, and although it did eventually set, it took a surprisingly long time for the parts to stick. It came right apart after 20-30 minutes, and only really set overnight. The internet says I could use baking soda as a “kicker” to get the parts to stick better, but I’ll have to save that tip for the next project.

Making the bins #
This part is going to be very particular to your use case, but in my case I needed space for AA, AAA, 9V, C, D and a variety of coin cell batteries. I often buy the big packs of batteries so a lot of space is needed for the more common types. Since I have a few odds and ends, and was running out of space for custom bins, I used a couple of generic gridfinity bins that were not specialized for a battery type.
| Qty | Description | File Link | Total Plastic Weight |
|---|---|---|---|
| 1 | 2x2 Bin | Gridfinity Generator | 36.68 grams |
| 1 | 3x5 Bin | Gridfinity Generator | 114.56 grams |
| 1 | LR41 Bin | Printables | 14.69 grams |
| 2 | LR1130 Bin | Printables | 29.76 grams |
| 1 | LR44 Bin | Thingiverse | 15.39 grams |
| 1 | CR2032 Bin | Printables | 16.32 grams |
| 1 | 9V + AAA Bin | Makerworld | 165.61 grams |
| 1 | AA Bin | Makerworld | 141.07 grams |
Putting it all together and feedback #
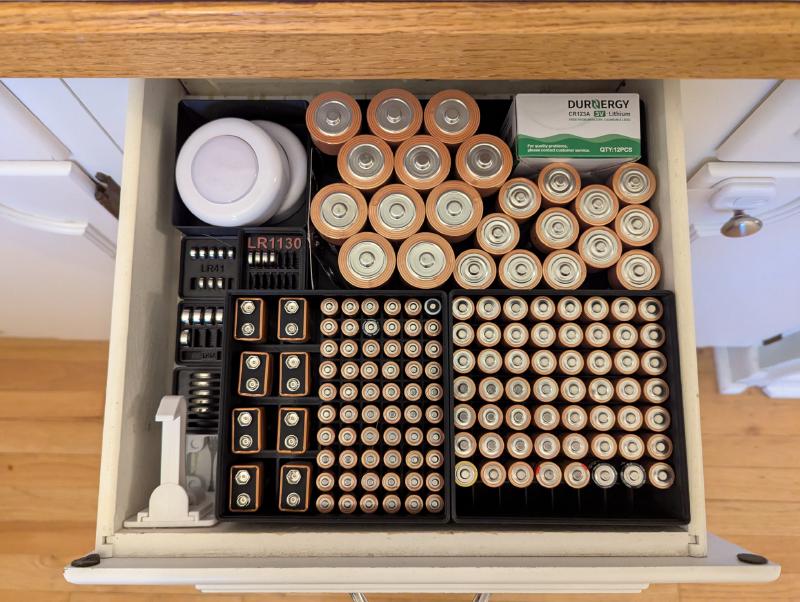
And for the final reveal - here is what my drawer now looks like filled with batteries (and two puck lights and a baby lock).

Overall, I’m very happy with this transformation. It was very convenient to get all of this done without having to do anything in CAD. With that in mind, there are a couple of things that I think could be better, if I ever have time to go back and remix any of these models.
- High density stackable bins like the AA bin are hard to get batteries out of if they are full. It would be better to not make them stackable in short drawers like mine.
- Some models like the LR41 bin have indented text. It would be nicer to have embossed text, preferably with multi-material support. In the LR1130 model, a paint pen was used to color the letters red.
The Bambu Studio estimated amount of plastic used (excluding any of my warpage problems) was 736.8 grams, for a total cost of $10.93 at the current Amazon.com price of $13.99 + tax for a 1kg spool of SUNLU PLA.
